Installing snowboard bindings may seem complicated at first, but the process is fairly simple once you understand the mounting system. You mainly need to choose the correct binding position, stance, mounting holes, and screw placement.
In most cases, you can install bindings at home with a #3 Phillips screwdriver or snowboard tool. Just check compatibility first and use the hardware provided with your bindings.
This guide covers how to attach snowboard bindings on 2×4, 4×4, and Burton Channel systems, plus binding angles, beginner setups, goofy stance, all-mountain, and park setups.
How Are Snowboard Bindings Attached?
Snowboard bindings are attached to the board through the binding baseplate and the board’s mounting interface.
On traditional 2×4 and 4×4 snowboards, the binding is normally secured with four screws through a mounting disc or baseplate. Burton’s Channel system works differently: the bindings attach to inserts that slide inside two channels, allowing the stance width and position to be adjusted more freely.
Before you start, check these three things:
- Your bindings fit your snowboard’s mounting system.
- You have the correct screws, washers and mounting discs.
- Your snowboard boots fit the bindings correctly.
Most modern bindings work with more than one mounting system, but compatibility should never be assumed. Some discs are designed specifically for 2×4, 4×4, 3D or The Channel.
What You Need to Install Snowboard Bindings
You don’t need a large toolbox.
For most snowboard binding setups, you will need:
- Your snowboard
- Two snowboard bindings
- Snowboard boots
- The mounting discs or hardware supplied with the bindings
- The correct screws and washers
- A #3 Phillips screwdriver or snowboard multitool
- A tape measure for checking stance width
A boot is useful during setup because the binding can look centered while the boot itself is not. Checking the boot position helps prevent excessive toe or heel overhang.
Step 1: Check Your Snowboard Binding Mount Type
Before putting a screwdriver anywhere near the board, identify its mounting system.
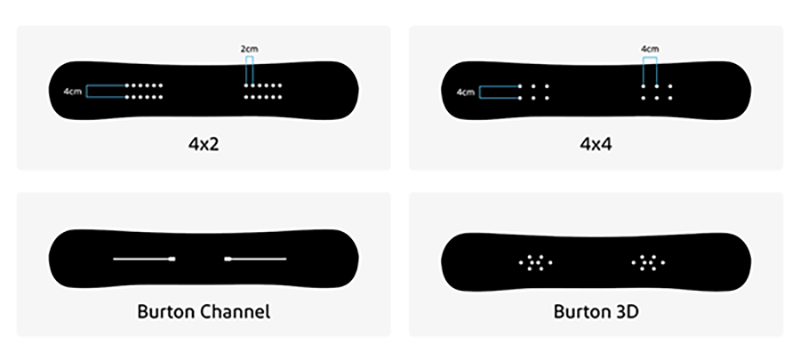
There are four main snowboard mounting patterns you may encounter:
2×4 Mounting Pattern
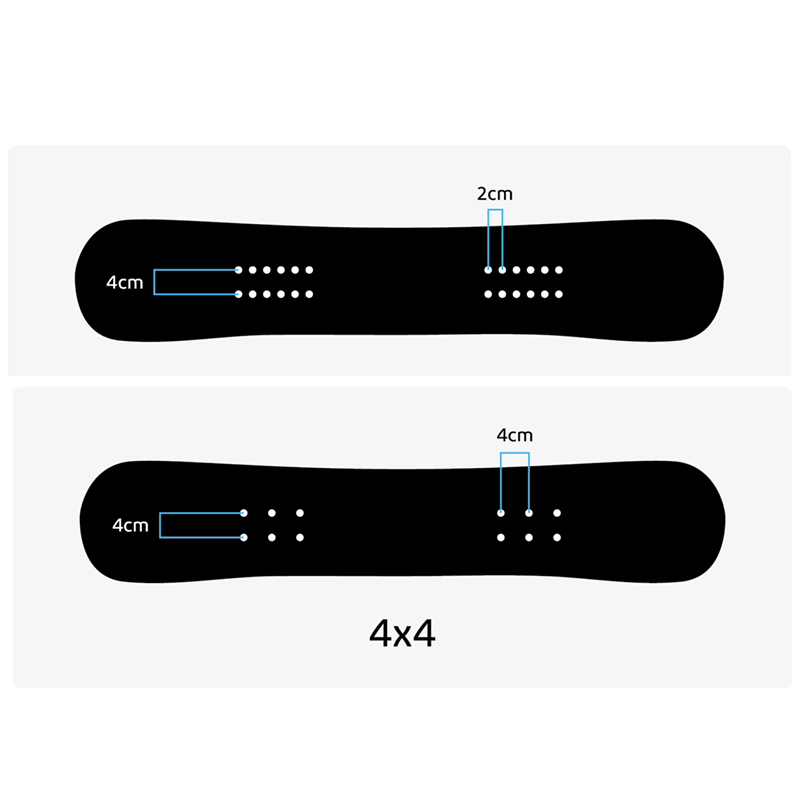
The 2×4 system is one of the most common mounting patterns on modern snowboards. The holes are arranged in two rows, with the holes in each row spaced 2 cm apart and the rows 4 cm apart.
The extra holes give you more options for adjusting stance width and binding position. Each binding is normally attached with four screws.
4×4 Mounting Pattern
The 4×4 system uses holes spaced 4 cm apart in both directions. It is an older mounting standard and is less common on modern adult boards, although you may still find it on some entry-level, youth, or specialty snowboards.
Like the 2×4 system, it normally uses four screws per binding.
Burton 3D
The older Burton 3D pattern uses a different arrangement of inserts and three screws per binding. It was largely discontinued on Burton’s main snowboard line, so you are more likely to encounter it on an older or second-hand board.
Burton The Channel
The Channel uses two long slots instead of a traditional grid of mounting holes. It gives you much more freedom to adjust stance width, binding position, and setback.
Burton EST bindings are designed specifically for The Channel, while some other bindings can also be used with the correct Channel-compatible mounting discs.
Important: Don’t force a mounting disc or screw into a pattern that doesn’t match. If you’re unsure, check the binding manufacturer’s compatibility chart before mounting.
Step 2: Determine Regular or Goofy
Before you attach the bindings, figure out which foot goes at the front.
There are two basic snowboard stances:
- Regular: left foot forward
- Goofy: right foot forward
If you already know your stance, use it. If you’re a beginner, one simple way to get an idea is to stand naturally and have someone gently push you from behind. The foot you instinctively put forward to catch yourself is often your lead foot.
Your lead-foot binding goes toward the nose of the snowboard.
The easiest way to identify the front of the board is usually by checking the board’s graphics, directional shape, or manufacturer markings.
How to Set Up Snowboard Bindings for Goofy
If you ride goofy, your right foot is the front foot, and your left foot is the rear foot.
The installation process itself is not fundamentally different. You simply position the right binding at the front of the board and the left binding at the rear.
Make sure the binding buckles are on the outside of your feet. The shape of the highback and baseplate should also match the corresponding boot.
Step 3: Choose Your Snowboard Binding Angles
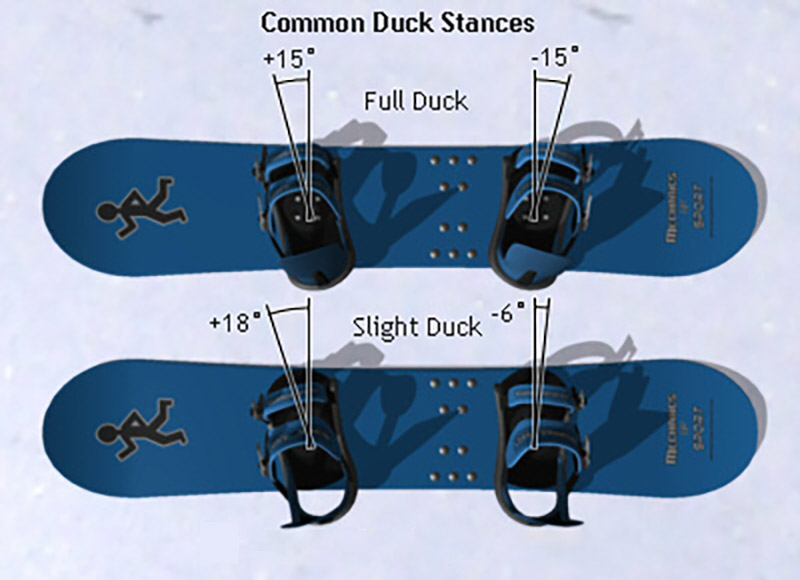
Binding angle describes how much each binding is rotated relative to the snowboard.
A setup such as +15/-6 means:
- Front binding: 15 degrees toward the nose
- Rear binding: 6 degrees toward the tail
There are three common types of snowboard binding angles.
Positive / Zero: +15/0
The front binding points toward the nose, while the rear binding sits at 0 degrees.
This is a simple starting point for beginners because it makes it easier to learn basic turns and control the board. Burton recommends starting beginners at a positive/zero setup and adjusting from there.
Positive / Positive: +15/+6
Both bindings point toward the nose.
This is common among all-mountain riders because it provides a comfortable position for riding primarily forward and can work well for carving.
Duck Stance: +15/-6 or +15/-9
The front binding points toward the nose and the rear binding points toward the tail.
This is called a duck stance. It is particularly common among freestyle and park riders because it makes riding switch more natural.
There is no single perfect angle for everyone. Your boots, knees, riding style, flexibility, and personal comfort all matter.
Step 4: Set Your Stance Width
Stance width is the distance between the centers of your front and rear bindings.
For your first setup, use the snowboard manufacturer’s reference stance as your starting point. A slightly wider stance can provide more stability, while a narrower stance can make the board feel quicker from edge to edge.
You don’t need to find your perfect width before your first ride. Start close to the reference stance, ride the board, and make small adjustments.
For beginners, the manufacturer’s reference stance is usually a better starting point than copying another rider’s setup.
Step 5: Attach Snowboard Bindings to a 2×4 or 4×4 Board
Now you can start the actual installation.
1. Place the front binding on the board
Put the binding on the correct side of the board according to your stance.
If you ride regular, the left binding is the front binding. If you ride goofy, the right binding is the front binding.
2. Choose the mounting holes
Use the board’s reference stance as your starting point.
For a 2×4 board, choose the holes that give you the stance width you want. For a 4×4 board, use the appropriate four-hole configuration.
3. Set the binding angle
Place the mounting disc into the binding and align its angle indicator with your chosen angle.
For example, a beginner might start around +15 degrees on the front binding.
Make sure the binding is pointing toward the nose rather than accidentally rotating it toward the tail.
4. Insert the screws
Line up the mounting disc with the inserts in the snowboard.
Insert the screws with their washers and turn them by hand first. Make sure the threads start cleanly rather than forcing them.
5. Tighten gradually
Do not fully tighten one screw while leaving the others loose.
Instead, tighten the screws gradually in an alternating pattern. This keeps the binding seated evenly on the board.
Avoid overtightening. REI specifically recommends not overtightening the mounting screws, and stripped screws can make future adjustments much harder.
6. Repeat for the rear binding
Set the rear binding to your chosen angle and repeat the process.
Double-check that the rear binding points in the correct direction before tightening it.
Step 6: How to Install Bindings on a Burton Channel Board
Installing bindings on Burton’s Channel system is slightly different from installing them on a traditional 2×4 board.
The basic idea is simple: instead of lining up four screws with four fixed holes, you use Channel inserts that slide along the slots.
For Burton EST bindings, the general process is:
- Remove the Channel plug.
- Insert the Channel hardware.
- Place the binding over the Channel hardware.
- Start the screws without fully tightening them.
- Slide the binding into your desired position.
- Set the binding angle.
- Check boot centering.
- Tighten the screws evenly.
The Channel allows the rider to adjust stance width, setback, and binding position with much more freedom than a traditional four-hole system.
For non-EST bindings, make sure you have the correct Channel-compatible mounting disc before starting. Some Burton Re: Flex bindings, for example, can be mounted on The Channel with the appropriate disc.
Step 7: Put Your Snowboard Boots in the Bindings
Don’t skip this step.
After loosely mounting each binding, put your snowboard boot in and check how it sits on the board.
Ideally, the toe and heel should be reasonably centered so that you don’t have excessive overhang on one side.
Also check the straps.
The ankle and toe straps should sit properly over the boot rather than pulling heavily toward one side. Proper strap positioning helps distribute pressure more evenly and gives you better control.
If the boot looks noticeably shifted toward the toe or heel edge, adjust the binding position before fully tightening everything.
How to Set Up Snowboard Bindings for Beginners
If you are setting up your first snowboard, don’t overcomplicate it.
A sensible starting setup is:
Stance: Manufacturer’s reference stance
Front angle: Around +15°
Rear angle: 0° or a small negative angle
Binding position: Start at the reference position
Boot position: Centered to minimize toe and heel overhang
Burton recommends +/0 as a beginner starting point, while many riders eventually move to a small negative rear angle once they become more comfortable.
Your first setup does not have to be your final setup. Ride it for a few runs and pay attention to your knees, balance, and turning response.
If your stance feels uncomfortable, make one change at a time.
Snowboard Binding Angles for All-Mountain Riding
All-mountain snowboarding involves everything from groomed runs to variable snow, carving and occasional park laps.
A common starting point is:
+15/+6
Another option is:
+15/-6
The first gives you a more directional stance, while the second gives you a little more freedom for riding switch.
There is no universal all-mountain angle. Burton notes that stance angle depends heavily on personal preference, and riders can adjust their setup based on terrain and riding style.
If you mostly ride forward and enjoy carving, a positive/positive setup may feel natural. If you frequently ride switch, a duck stance is worth trying.
Final Check Before You Ride
Before heading to the mountain, take a few minutes to inspect the entire setup.
Check that:
- Both bindings are on the correct sides.
- Your regular or goofy stance is correct.
- The binding angles match your intended setup.
- The stance width is appropriate.
- Your boots are centered.
- Toe and ankle straps fit securely.
- All mounting screws are properly tightened.
- Nothing moves when you push the binding firmly by hand.
It’s also a good idea to carry a snowboard multitool when riding. Binding hardware can loosen over time, and having a tool lets you make small adjustments on the mountain.
Frequently Asked Questions
Q1: Can I Mount Snowboard Bindings Myself?
Yes. Most snowboarders can install bindings at home with basic tools. Just make sure the bindings are compatible with your board and use the correct mounting hardware. If the screws don’t fit or the binding doesn’t sit properly, check the manufacturer’s instructions or ask a snowboard shop for help.
Q2: Can You Put Bindings on Any Snowboard?
Not necessarily. Bindings must be compatible with the board’s mounting system, such as 2×4, 4×4, The Channel, or older 3D systems. Always check that the binding’s mounting disc and hardware match your snowboard before installation.
Q3: What is the easiest snowboard binding setup for a beginner?
Start with the snowboard manufacturer’s reference stance and a simple angle such as +15/0. Once you have some riding experience, you can experiment with the rear binding angle and stance width.
Q4: What angle should snowboard bindings be?
There is no single correct angle. Around +15° on the front is a common starting point. Beginners may use +15/0, all-mountain riders may prefer +15/+6 or +15/-6, and park riders often use a duck stance such as +15/-6.
Q5: How tight should snowboard binding screws be?
They should be secure, but don’t overtighten them. Tighten the screws evenly and stop once the binding is firmly secured. Overtightening can damage or strip the hardware.
Tip: Check Your Snowboarding Gear Before You Ride
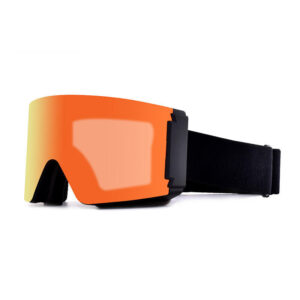
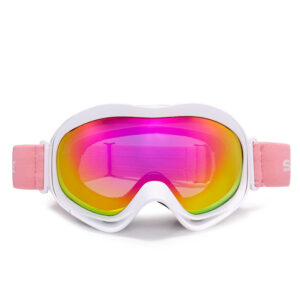
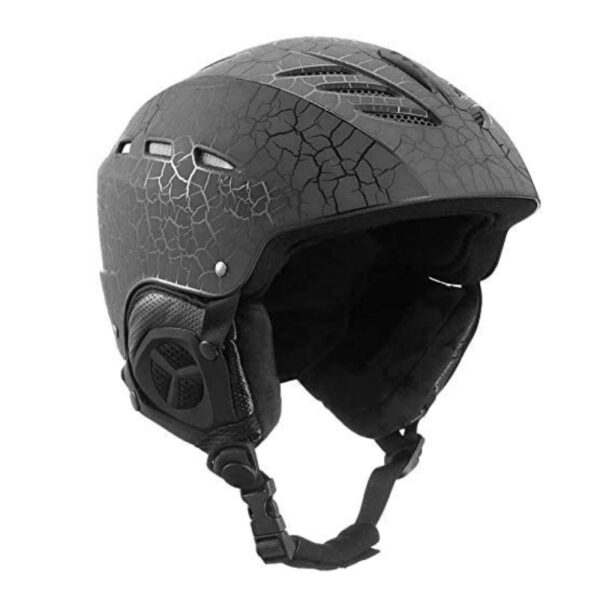
Installing your snowboard bindings is only part of getting ready for the mountain. Before you ride, check your boots, helmet, and goggles as well. Your goggles should fit securely with your helmet, provide a clear field of vision, and stay comfortable throughout the day.
Looking for snow sports eyewear? FukoSports offers ski and snowboard-friendly goggles designed for different riding conditions, including options with anti-fog and UV protection. Check out the latest snow sports eyewear at FukoSports.
The Bottom Line
Learning how to attach snowboard bindings comes down to choosing the right mounting system, stance, and binding angles. Check compatibility, determine your regular or goofy stance, mount the bindings with the correct hardware, and make sure your boots are centered.
For a first setup, start with the board’s reference stance and around +15/0. After a few runs, fine-tune the angles, width, and setback to suit your riding style.
Read More: